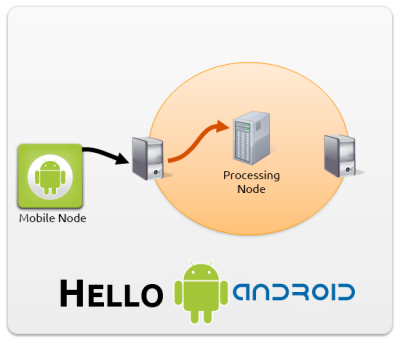
HelloAndroid - Ping Application
 This tutorial will guide you through the basic concepts on how to use SDDL with an Android device. We are going to show how to create a MrUDP connection using Android Services (this service will be named ConnectionService) and exchange messages between the device and a node on server. We will also show a different implementation using AsyncTasks that, while easier to implement, is recommended only for prototypes, not for final applications.
Our tutorial will be divided in two, the first part is the Android code and implementation, the second is the server node that will receive the ping message sent from the Android, print it, change and send it back to the device.
But before we dive into the code, I am going to introduce two concepts quickly, Android services and Local Broadcast Manager.
You do not need to copy the source code snippets shown in this tutorial. At the end there is a link to download the entire source code.
Android :: Service
The Android service is a component that runs on background for a long period of time without a user interface (UI). Each service must be declared on AndroidManifest.xml file with the <service> tag.
An Android service has two stages, the first call is to the method onCreate() and after that the onStartCommand() is called. A service is started calling startService() passing an intent as parameter. A service is destroyed and the method onDestroy() is called, this will happen when stopService() is called or when Android needs resources from the operational system.
Android :: Local Broadcast Manager
The Local Broadcast Manager was introduced to the Android Support Library to simplify the process of registering for, and sending, Broadcast Intents between components within your application. The Local Broadcast Manager is restricted to your application only, it's not a global broadcast (a global broadcast is an intent sent to all the components installed on the device), this improve the security of your application because all broadcast messages are local.
To use Local Broadcast Manager, you must include the Android Support Library in your application.
Using Local Broadcast Manager is very simple. To get a new instance you do:
LocalBroadcastManager lbm = LocalBroadcastManager.getInstance(context);
Where context is the Context object from Android, a lot of components on Android has this context, Activity, Services and etc.
To send a local broadcast you do, first you need to create an intent with a String object being the action, like this:
String action = "ActionID"; /* Action Identification as String*/
Intent intent = new Intent(action);
lbm.sendBroadcast(intent);
To receive a local broadcast on the component you need to, first create an object that has type as BroadcastReceiver, second create an IntentFilter to receive only the actions registered to this broadcast receiver, third register the broadcast receiver with this IntentFilter created.
/* First: creating BroadcastReceiver object */
private BroadcastReceiver mBroadcast = new BroadcastReceiver () {
    @Override
    public void onReceive(Context c, Intent i) {
        /* Obtain the action string from the intent that we are receiving */
        String action = i.getAction();
        /* Compare this intent with our action declared earlier */
        if (action.equals("ActionID")) {
            // Action matches, do something.
        }
    }
};

/* Second and Third: create a IntentFilter and assign this IntentFilter to the Local Broadcast */
IntentFilter filter = new IntentFilter();
/* Assign to this IntentFilter the action */
filter.addAction("ActionID");
/* Register this intent filter with this broadcast receiver */
lbm.registerReceiver(mBroadcast, filter);
Now with the lbm.registerReceiver() called we are able to receive broadcasts, if you want to unregister a broadcast receiver, just call lbm.unregisterReceiver(mBroadcast).
You can only send a local broadcast if you have an action registered, if you try to call lbm.sendBroadcast() with an action that is not registered with any broadcast receiver, it will fail and the method sendBroadcast() will return false.
Android + SDDL :: Connection Service
The first thing to know is, a Service by default runs on the MainThread. This Thread runs all the UI components, so if you run something that blocks for a long time the Thread or something that needs to do some heavy work the UI will freeze and Android will kill your application. To avoid this we need to create a new Thread that will handle the network work.
This is the network Thread implementation:
/*start a new Thread for the connection*/
private void startThread () {
	t = new Thread(new Runnable () {
		public void run () {
			try {
				/*create a new MR-UDP connection*/
				connection = new MrUdpNodeConnection();

                                /* Obs.: the **listener** is declared in onStartCommand() */

				/*assign the listener to the connection created*/
				connection.addNodeConnectionListener(listener);

				/*obtain from the SharedPreferences the IP and PORT*/
				String ip = AppConfig.getIp(c);
				int port = AppConfig.getPort(c);

				/*create the socket and assign the ip and port*/
				socket = new InetSocketAddress(ip, port);

				/*assign the socket with the connection*/
				connection.connect(socket);

				while (keepRunning) {
					if (!isConnected) {
						/*disconnect and set the thread to null*/
						keepRunning = false;
                                                /* disconnect the MrUDP */
						connection.disconnect();
						stopThread(t);
					}
					if (isConnected) {
						/*send all the msgs on the queue*/
						while (lstMsg.size() > 0) {
							connection.sendMessage(lstMsg.get(0));
							lstMsg.remove(0);
						}
					}
					synchronized (t) {
						/*wait for the next iteration, waiting for someone
						 * call notify()*/
						t.wait();
					}
				}
			}
			catch (Exception e) {
				e.printStackTrace();
			}
		}
	});

	/*start the thread*/
	t.start();
}
The part before while() is very simple, just the creation of objects. The important part are inside the while(), there are two variables controlling the connection service, the first is the keepRunning and the second is isConnected. The keepRunning flag is to keep the while() to run forever until we disconnect and the isConnected is another flag to track if we are connected. The isConnected flag is just to control the service, it is not a flag to tell if we have a MrUDP connection.
The Thread.wait() is to “freeze” the Thread if we are not doing any work, all others actions will wake up the Thread with Thread.notify(), waking up the Thread and isConnected is true, it will send all the messages on the list and wait again.
The current implementation, for each message the Thread will wake up, send the message and waiting again for the next message.
Now the initialization of the connection service, the onCreate() and onStartCommand() methods.
The onCreate() is very simple, just initializing some variables as shown below:
@Override
public void onCreate() {
	super.onCreate();

	/*initialize the variables*/
	t = null; /*thread = null*/
	keepRunning = true; /*keep WHILE running*/
	isConnected = false; /*connection service running*/
	lstMsg = new ArrayList<Message>(); /*Message list*/
}
The onStartCommand() have some important points to discuss, code below:
@Override
public int onStartCommand(Intent i, int flags, int startId) {

	/*get context*/
	c = ConnectionService.this;

	/*set IS_SERVICE_RUNNING flag to RUNNING*/
	AppConfig.saveService(c, true);

	/*instantiate the local broadcast*/
	lbm = LocalBroadcastManager.getInstance(c);

	/*register broadcast*/
	registerBroadcast();

	/*if its not connected, connect*/
	if (!isConnected) {
		/*create/get a UUID to be used by the connection service
		* Check if we have a valid UUID, if not create one*/
		uuid = AppConfig.getUuid(c);
		if (uuid == null) {
			/*generate one and save it*/
			uuid = AppConfig.generateUuid();
			if (!AppConfig.saveUuid(c, uuid))
				// Log.d() removed
		}

		/*instantiate the listener for this connection*/
		listener = new ConnectionListener(c);

		/*connecting to MrUDP*/
		isConnected = true;

		/*initialize the Thread*/
		startThread();

	}

	return START_STICKY; /*if we get killed by Android, restart service*/
}
Let's go step-by-step, We get the context c = ConnectionService.this, the class Service extends Context, knowing that we can get the Context from the service to be used by the Local Broadcast Manager.
I have made a SharedPreferences to save the state of the services and flags to be shown on the Activity (the screen), so we save that the service is running with AppConfig.saveService(c, true).
After that we initialize the Local Broadcast Manager and register the broadcast receiver for this service, code of the broadcast receiver below:
/*all the received messages will be executed here*/
private BroadcastReceiver mBroadcast = new BroadcastReceiver () {
	/*it is called when we receive a new broadcast message*/
	@Override
	public void onReceive(Context c, Intent i) {
		/*get the action from the Intent*/
		String action = i.getAction();

		/*check each broadcast message action if we have more than one*/

		/*message received, retrieve and call the create and queue*/
		if (action.equals(BroadcastMsg.ACTION_CHAT_SEND_MSG)) {
			String msg = i.getStringExtra(BroadcastMsg.EXTRA_CHAT_MSG);
			createAndQueueMsg(msg);
		}
	}
};
Now inside the if (!isConnected) we need to check if we have a UUID, MrUDP needs a valid UUID to work, so we check, if we do not have one saved inside the SharedPreferences we create a new one and save inside the SharedPreferences for future use.
The user of the device has total control about the SharedPreferences, if the user deletes the SharedPreferences file from the device, going to the preferences on the device and clear the cache, the UUID saved will be lost, this way the service will generate a new one.
It is not a good practice to obtain a unique ID for the device using the device ID, if the device does not have support for telephony it will return null. MAC address may not work if it is off or not present on the device.
If you sell the device the ID will not change, so a miss interpretation of the UUID, since it is the wrong person now using the device.
Best practice is to set a unique installation ID, like I did with the UUID for the service, if the user uninstall the app and reinstall, generate a new one. Track user by installation, not device ID.
The last important thing to know is the flag used on the return statement. The START_STICKY is used to inform the Android that we want this service to be running all the time, what that means ? Android is a system that depending on the usage it may kill our service to get more resources and do their stuff, but after doing the work we will release resources and that is the point that START_STICKY comes to play, when Android releases more resources our service will be started by Android again, staying on all the time.
Android + SDDL :: Connection Listener
The connection listener is the callback for all MrUDP actions, when MrUDP establishes a connection the listener connected() is called. It is important to send one message, this way the Gateway knows that we exist as a node. I am sending a String with ack, nothing special here.
@Override
public void connected(NodeConnection nc) {
	/*save the we have a MrUDP connection to shared preferences*/
	AppConfig.saveIsMrUdpConnected(c, true);

	/*We need to send a message to be identified*/
	ApplicationMessage am = new ApplicationMessage();
	am.setContentObject("ack");
	am.setTagList(new ArrayList<String>());
	/*for security check if we are not getting NULL, not done here*/
	am.setSenderID(AppConfig.getUuid(c));
	try {
		nc.sendMessage(am);
	} catch (IOException e) {
		e.printStackTrace();
	}
}
Another important callback is when we receive a message from the Gateway, I am using Local Broadcast Manager. When we receive a message and this is a simple chat program, it will be passed the correct action to the Intent and broadcasted to the component that it is listening for this action on the broadcast receiver, in this case is the MainActivity that will get the message and print on the screen.
We are adding additional data to the Intent with the putExtra(), we are passing the String that we received from the Gateway.
@Override
public void newMessageReceived(NodeConnection nc, Message m) {
	/*send the message to the chat*/
	String msg = m.getContentObject().toString(); /*unserialize message*/
	/*send the message to the client*/
	Intent iMsg = new Intent(BroadcastMsg.ACTION_CHAT_RECEIVED_MSG);
	iMsg.putExtra(BroadcastMsg.EXTRA_CHAT_MSG, msg);
	lbm.sendBroadcast(iMsg);
}
Server + SDDL :: Node Client
This is the second part, a project that prints on console the messages sent from the Android and it is possible to send message to Android.
First we initiate the SDDL Layer, code:
/*create a layer*/
sddlLayer = UniversalDDSLayerFactory.getInstance();

/*create a participant*/
sddlLayer.createParticipant(UniversalDDSLayerFactory.CNET_DOMAIN);

/*we are going to receive and write topics to domain*/
sddlLayer.createPublisher();
sddlLayer.createSubscriber();

/*creates a topic that we are going to listen*/
Object receiveTopic = sddlLayer.createTopic(Message.class, Message.class.getSimpleName());

/*creates a topic to send to mobile node*/
Object sendTopic = sddlLayer.createTopic(PrivateMessage.class, PrivateMessage.class.getSimpleName());

/*set the data reader with the topic we created*/
sddlLayer.createDataReader(this, receiveTopic);

/*set the data writer*/
sddlLayer.createDataWriter(sendTopic);
This code above is equal to others tutorials check HelloCore.
Now the main() for this project, code:
public static void main(String[] args) {
	new SDDLServer();
	try {
		while (true) { /* keep running */
		    /*print on screen the input message*/
		    System.out.print("Escreva a mensagem: ");

		    /*create and get the input from console*/
		    BufferedReader bufferRead = new BufferedReader(new InputStreamReader(System.in));
		    String inputMsg = bufferRead.readLine();

		    /*create a private message*/
		    PrivateMessage pMsg = new PrivateMessage();
		    pMsg.setGatewayId(gatewayId);
		    pMsg.setNodeId(nodeId);

		    /*create a application message with the MESSAGE*/
		    ApplicationMessage appMsg = new ApplicationMessage();
		    appMsg.setContentObject(inputMsg);

		    /*assign the private message the application message to be sent to mobile node*/
		    pMsg.setMessage(Serialization.toProtocolMessage(appMsg));

		    /*write topic to DDS*/
		    sddlLayer.writeTopic(PrivateMessage.class.getSimpleName(), pMsg);
		}

	} catch (IOException e) {
		e.printStackTrace();
	}
}
The first part is simple, Java waits for the input from console, a message to be sent to Android. After that we create a PrivateMessage, private messages are sent to the Gateway that will forward to the mobile node. The gateway needs to know the Node ID, in this example I am retrieving the Gateway ID and Node ID from the message that the Android sent.
The way this project is written the first message must be send from Android, because I am getting the Gateway ID and Node ID from the message received on the callback onNewData (explained later).
If you try to send the first message from SDDL-LongRunningServer project the message will not be delivered, because the Gateway ID and Node ID will be NULL.
To listen for new messages we need to add a listener UDIDataReaderListener<ApplicationObject> and implement the onNewData method, code:
/*called when there is new data on the DDS domain*/
@Override
public void onNewData(ApplicationObject topicSample) {
	Message msg = null;
	/*check if the topic type is a Message*/
	if (topicSample instanceof Message) {
		/*we can cast safely*/
		msg = (Message) topicSample;

		/*get the Gateway IP and NodeID, we have only one*/
		gatewayId = msg.getGatewayId();
		nodeId    = msg.getSenderId();

		/* we have a serializable object, so using the Serialization class
		 * we obtain converting to a Serializable object
		 */
		Serializable s = Serialization.fromJavaByteStream(msg.getContent());

		/*check if is a String object, we sent as a String from Android*/
		if (s instanceof String) {
			/*just print on console and filter the `ack` message to be
			 * identified by the Gateway
			 */
			if (!s.equals("ack")) {
				System.out.println(""); /*just create a new line*/
				System.out.println("Mensagem Recebida: "+s);
				System.out.print("Escreva a mensagem: ");
			}
		}
	}
}
We now are listening for new messages sent from the Gateway, this code is just getting this message and checking for the correct type. Android is sending a String object, so we check for this and if everything is OK this String is printed on console.
The if() that check if the String is equal to ack, it is just used to filter the first message sent on the connected() listener on the Android, so this way it is not printed on console.
Execution
To test the projects do:
1. Import the projects to Eclipse, for the Ping Example: * SDDL-PingServer (Server Node) * SDDL-PingServiceTest and SDDL-PingTaskTest (Android Nodes) * SDDL-Ping-Model, the shared project in which the models known to both client and server are included or, for the LongRunning Example: * SDDL-LongRunningServer (Server Node) * SDDL-LongRunningTest (Android Node) * InfoPAE-Model, the shared model project
2. Get the local IP and copy it to the run configurations for the Gateway, then run it
3. Run the SDDL-LongRunningServer project or the SDDL-PingServer
Ping Example
4. On any of the Ping apps, simply type the IP:PORT and click on Ping to send a Ping message to the server. The server will respond the message and you should see a “Pong!” on the screen shortly.
LongRunning Example
5.1 Click “Start Services” on Android and see if the MrUDP gets connected.
5.2 If anything fails check IP and Port
6. Send a first message from Android, this message will be printed on the console on the respective server project.
7. Now you can send a message back to Android from the console, just click with the mouse in the console and write a message and click enter to send.
Download
Link to download files
- For the LongRunning Example:
- SDDL LongRunningServer: https://bitbucket.org/endler/app-sddllongrunningserver
- SDDL LongRunningTest: https://bitbucket.org/endler/app-sddllongrunningtest
- InfoPAE Model: https://bitbucket.org/endler/app-infopae-model
- For the Ping Example:
- SDDL Ping Application (all projects): https://bitbucket.org/endler/app-sddlpingexample
or click here for the .zip version.